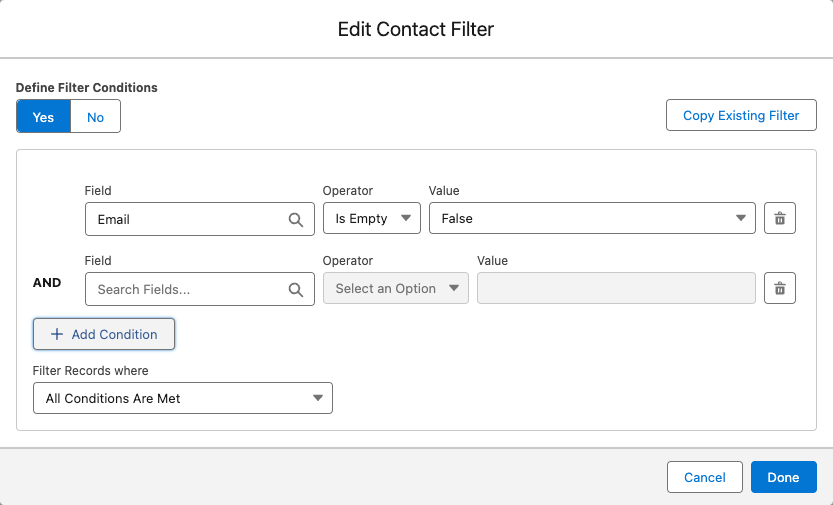
Define Filter Conditions
- By setting up filter conditions, we check if there is at least one record in the system that matches my defined criteria.
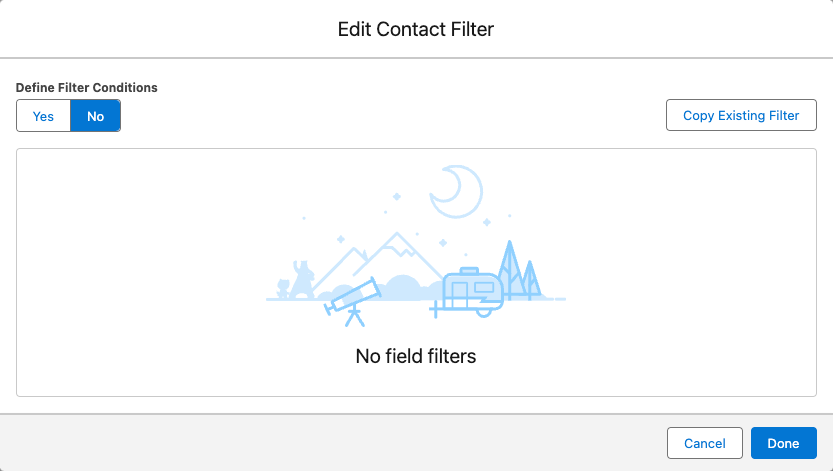
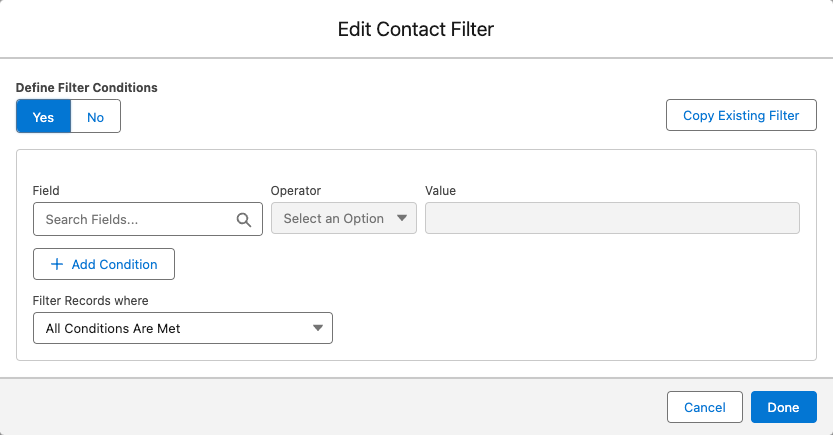
- On every object node that you access, you can define filter conditions. To do so, select Define Filter Conditions = Yes.
- This opens the Conditions Builder, consisting of 3 actions:
- Define a filter condition
- Add new condition(s)
- Condition filter logic
Define a Filter Condition
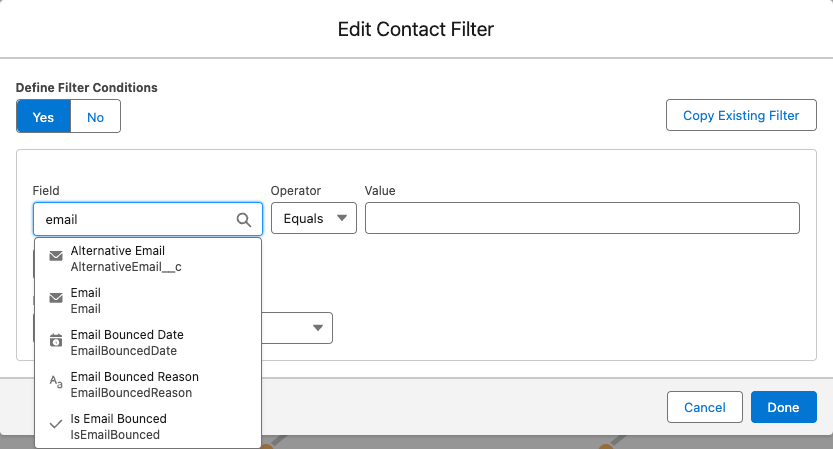
2. Select a field to filter based on its data.
- You can either scroll through the fields list or enter the name or a part of the field name or API name to narrow down the selection.
- Per each available field, you can see an icon indicating the field type (checkbox, text, date, etc.), the field label, and the API name.
- You got access to all standard, custom and managed package fields.
- Click on the field to confirm your selection.
Accessibility Security
Users can only select fields they can access based on their user permissions.
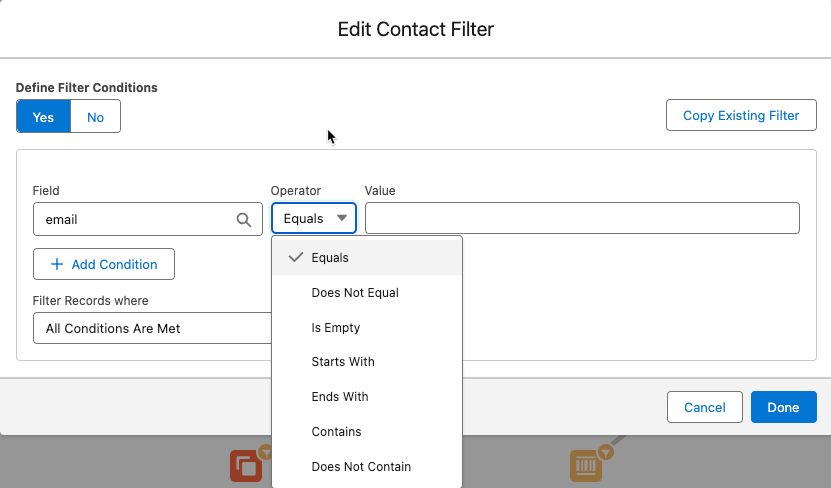
2. Select the Operator
- Based on the selected field type, you get a selection of available operators to choose from
3. Define your filter value
- To finalize your filter condition, select or enter a filter value.

Add New Condition(s)
- If you want to add more filter conditions, click + Add Condition and repeat the steps of Define a filter condition.
Remove Filter Condition(s)
- If you made a mistake and want to remove a filter condition, click the bin icon to the right of this filter condition.
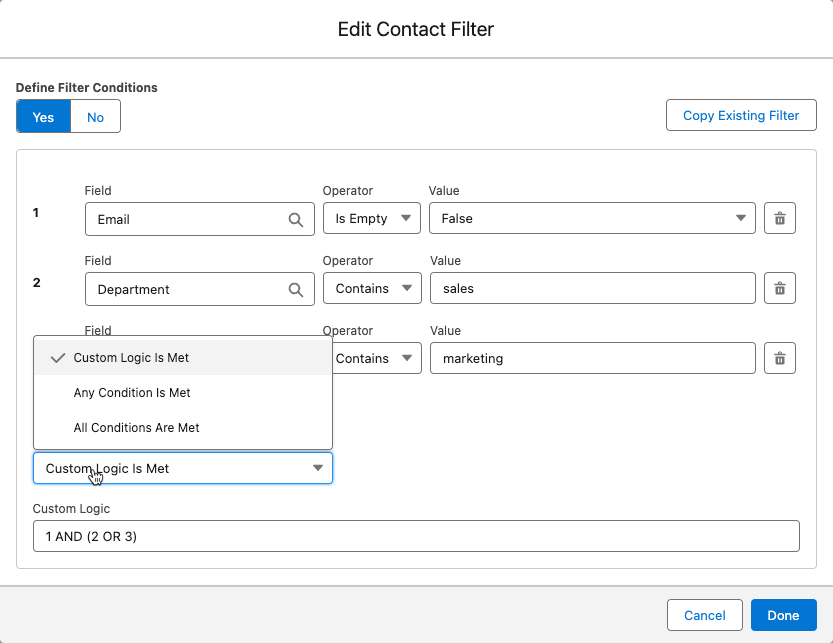
Condition Filter Logic
- As soon as you have more than one filter condition, you need to decide what logic should apply.
- The default logic is: All Conditions Are Met.
- So, each defined filter condition must be met for a record to be part of this audience.
- Condition 1 AND Condition 2 AND Condition 3.
- Alternatively, you can choose:
- Any Conditions Are Met
- Using this filter logic, it doesn't matter which filter conditions are met as long as one is met.
- Condition 1 AND Condition 2 AND Condition 3.
- Custom Logic is Met
- Using this filter logic, you unlock a custom input field where you need to define the logic yourself.
- A number displays each filter condition that you can see to the left of the conditions.
- You can use brackets to nest a certain logic.
- Example: Condition 1 AND (Condition 2 OR Condition 3)
- Any Conditions Are Met
Finish your Filter Conditions
- Once you've defined all filter conditions and set up the logic, click Done to finish the setup.
- If you don't want to save your input or changes, click Cancel or the close button (x) above the top right corner.